
Weblogic Server SSL Configuration
Note : - it's a third party SSL certificate configuration NOT self signed, For self sign certificate configuration see my this post -
Know about SSL, Identity & Trust
Self Signed Certificate Configuration
High Level Steps
1. Generate public & private key OR you can say generate a Keystore
2. Create CSR ( Certificate Service Request ) & send to certificate authority
3. Authority will send you ssl certificate, root certificate & intermediate certificate
4. Import all certificates to your keystore
5. Create/import trust using root certificate
6. Configure Weblogic for SSL which includes
i) Keystore tab configuration
ii) SSL tab configuration
iii) Enable SSL option with SSL port
In Detailed
Make sure you have java bin path properly set or run below commands directly from inside
java bin folder where you have keytool.exe/sh file
( In my case it's C:\Oracle\Middleware2\jrockit_160_24_D1.1.2-4\bin and I ran commands
from this directly only )
Generate Keystore - Public & Private Key
keytool -genkey -alias alias123 -keyalg RSA -keysize 2048 -keystore identity.jks -storepass storepass123 -keypass keypass123

Here you will get Identity file identity.jks
Note : Here instead of your first and last name you can give your domain name for which you are going to take certificate
Generate CSR
keytool -certreq -keyalg RSA -keysize 2048 -alias alias123 -file certreq.csr -keystore identity.jks -storepass storepass123 -keypass keypass123
Here you will get csr in certreq.csr file
Now you have to send this CSR to certificate authority and they will give you SSL certificate, root certificate & intermediate certificate
I have used Symantec trial certificate, follow below steps to get trial certificates
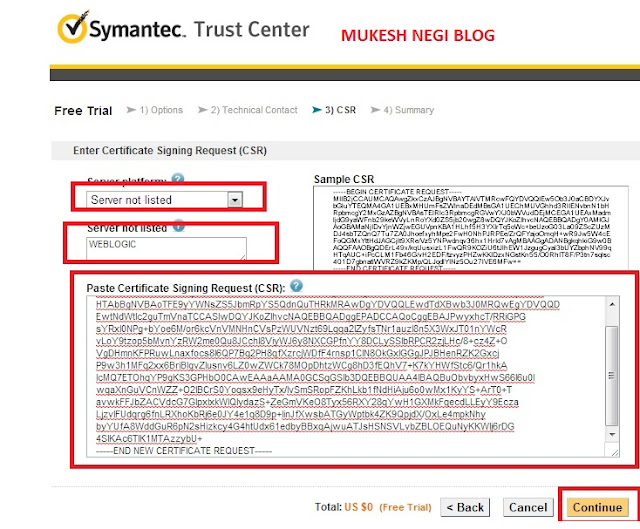
Go to https://www.symantec.com/verisign/ssl-certificates and click on try it free option as shown below

Click on continue

Paste your csr ( from certreq,csr ) here, select your server, if not there then select not listed and enter weblogic
you may get below screen, click continue

Accept aggrement and click continue

check your email
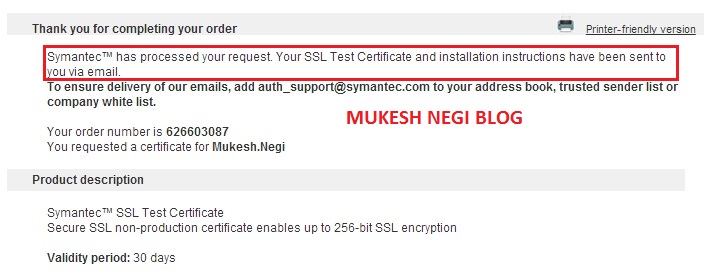
You will get mail like below

(1) - Is the certificate
(2). Is the root certificate
(3). Is the intermediate certificate
Now, copy #1 ( from BEGIN CERTIFICATE till END OF CERTIFICATE ) and save in a text file and rename it as cert.cer
Now click on #2 link and save certificate details in a text file rootCA.cer
---------------------------------------------------------------------------------------------------------------------------------( As highlighted below, this is a trial certificate so need to install on each client browser those going to access this application, since we are doing just for testing so you don't need to worry about it and also for production its not required, so take it just as a info )
Click for any one of the browser SO##### link

copy the certificate details and paste in a text file and rename it as rootCA.csr

---------------------------------------------------------------------------------------------------------------------------------
Now click on #3 link and same like above save certificate details in a text file and rename it as intermediatCA.cer
Now you have three files
1. cert.cer
2. rootCA.cer
3. intermediateCA.cer
Now, open a blank text file and copy/append all above three file contents in the same file and rename it as CertRootInter.pem ( copy in the same above sequence, first cert.csr, rootCA.csr just below and intermediateCA.csr at last )
Now you have one more file called CertRootInter.pem
Now, Import CertRootInter.pem ( which contain your all three certificates ) to you keystore
keytool -import -file CertRootInter.pem -alias alias123 -keystore identity.jks -storepass storepass123 -keypass keypass123

Next, create your trust file trust.jks by importing rootCA.cer
keytool -import -file rootCA.cer -alias alias321 -keystore trust.jks -storepass storepass123 -keypass keypass123

Now - you got your -
1. Identity file ( identity.jks ) which contains the certificates you got from certificate authority
2. Trust file ( trust.jks ) which contain rootCA certificate
Next, you can verify the certificate details from your keystore
Keytool -list -v -keystore identity.jks -storepass storepass123

Next Part is to configure weblogic which includes
- Keystore tab configuration
- SSL tab configuration
- Enable SSL port
Note :- This need to perform for each and every server for which you want to enable SSL
Login to admin console, click on your server, then on keystore tab and do the configuration like below
Click on configuration > Keystores, then select Custom Identity & Custom Trust option and save

Now, enter details of your identity and trust file with complete path where you have placed them, keystore type ( which is jks here ) and keystore passphrase for identity and trust ( we hace used storepass123 for both )

Now click on SSL tab and enter your private key alias ( alias123 here ) and passphrase ( keypass123 here )

Now go to General > Configuration and enable SSL option with the SSL port

Now you can check log file to make it's enabled properly and no error displaying there
Ok, So I have enabled SSL for admin server and I can able to access my admin console with http ( using port 7001 ) and with https ( using ssl port which i have used 7002 )
http://localhost:7001/console
https://localhost:7002/console
in the same way if you have enabled it for the managed server where you have deployed your applications then you can use your application using https also.
cheers...you are done!!!!!!!!!
This comment has been removed by the author.
ReplyDeleteIf they provided you one file then you have to import that file in your keystore as well as on trust.
ReplyDeleteHi Mukesh, If you can share the LDAP AND F5 load balancer steps that would be great help.
ReplyDeleteThanks you,
Surendra
This comment has been removed by the author.
ReplyDeletecreate CSR, send to CA authority, once they will send renewed certificate import that to your keystore using keytool import option.
ReplyDeletekeytool -import -file -alias -keystore -storepass