
Weblogic Server Installation Windows : In GUI Mode
Start installer, Double click on your .exe installer

Welcome, Click on next

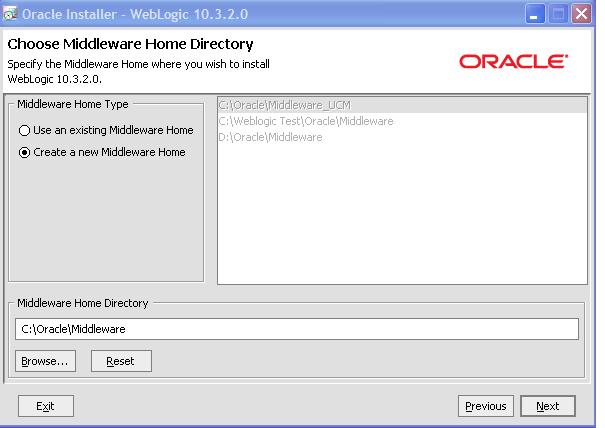
Select option, Create a new Middleware Home option and enter location for Middleware Home
Note : Earlier it was called BEA_HOME, now it refers as ORACLE_HOME or MW_HOME
Select Security update option and enter your email address & My oracle support password if you want to get security updates from oracle otherwise de select and click next

Select typical option for installation otherwise Custom to install specific components
Typical will install complete weblogic and it's all related components and custom will give you option to select or deselect components.

Select Product directory ( WL_HOME) ( recommended select default one )

Select first one option

See the components going to install & click next

Final screen

Weblogic console mode installation
If you want to proceed with console mode installation then use below command
If you want to proceed with console mode installation then use below command
Go to location where you have download software
use below command
[ installer -mode=console -log=log file name ]
server1001_win32.exe -mode=console -log=c:\weblogic.log
[ installer -mode=console -log=log file name ]
For example -
To start installation on Linux/Unix replace .exe installer with you .sh installer and change log file patch format accordingly.
Replace server1001_win32.exe with executable name on Linux/Solaris and change location to directory as per Unix like /home/bea/weblogic.log
Now most of the installers coming as Generic installer that can be run on any supported platform
See below for more on installation
Weblogic Server Installation On Console Mode
Generic Weblogic Server Installation
Tag : weblogic server installation, weblogic generic installer, how to install weblogic, weblogic installation in console mode, console mode weblogic installation
See below for more on installation
Weblogic Server Installation On Console Mode
Generic Weblogic Server Installation
Tag : weblogic server installation, weblogic generic installer, how to install weblogic, weblogic installation in console mode, console mode weblogic installation
No comments:
Post a Comment